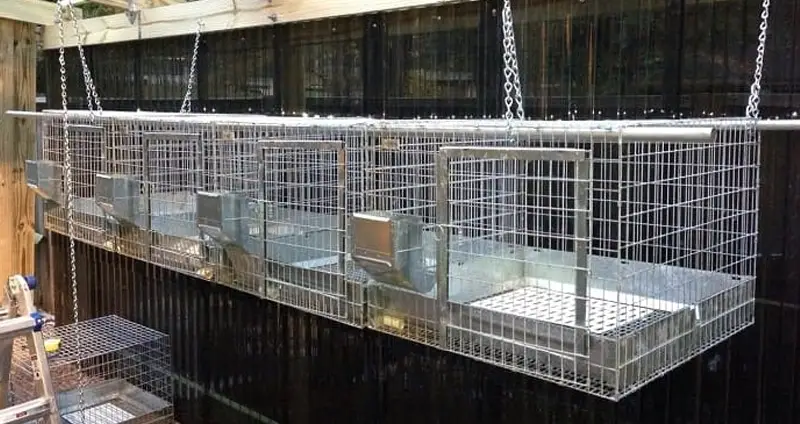
How To Construct Show, 4-H, or Meat Rabbit Hutches From Welded Wire
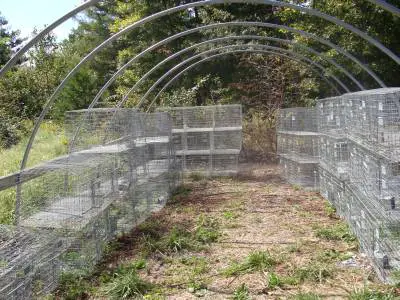
The first and most important decision is whether you should build your own cages or buy rabbit cages already built. (Click for an article on deciding whether to build or buy cages.) One assumption is that if you build your own cages, you’ll save lots of money. We did not find that to be the case. For 42 holes, we spent over $700. Probably with shrewd purchasing and just a little luck, we could have bought just about the same number of holes for the same amount of money, more or less. It is not financially worthwhile to make just a few cages because the tools involved are somewhat of an investment. (Note: wire has gone up in price dramatically since we built our first cages.)
What we did gain clearly was the ability to customize our cages to our barn: we made them just like we like them and made them to fit our spaces exactly. We also know how to repair our cages or alter them and we have the supplies and equipment to do that as well.
We spent a great deal of time building our cages, too. Generally, we spent two evenings working on a three-hole cage, from beginning to end. By the last few cages, we were probably a little faster than that. But we did have cage-building materials lying around for a couple of months before we were finished.
So, if you are looking to save a ton of money, building cages may not be for you. If you are in a real hurry, cage building might not be for you. But if you want a state-of-the-art, customized cage and don’t mind putting a bit of work into it (and want to save some money, perhaps), keep on reading! Also, if you have any way to get the materials cheaper or free, building your own is the only way to go.
What Size Cages Should You Make for Your Rabbits?
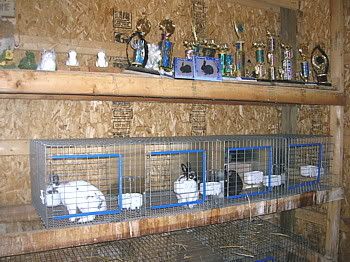
Now that you’ve decided to build your own cage, you’ll need to decide on the size you want to make. Keep the sizes of available wire mesh in mind when you decide. It’s a real pain to cut 2 inches of wire off of a 6-foot length, especially repeatedly. Selecting the most convenient dimensions will save a lot of work in the long run. Our holes are 2 feet x 2 feet (except for the last ones in each row, that had to be cut to 23 inches to fit). For the sake of keeping things simple, that size will be used in all directions. But you can make adjustments easily, once you understand the general idea.
The USDA recommends that rabbits have at least 3/4 sq foot of floor space per pound of body weight. That means a 2-pound Netherland Dwarf buck can do nicely in a cage that is only 12″ x 18″. However, almost all rabbit breeders keep their rabbits in much roomier cages. The smallest size that is almost ever used by a show rabbit breeder is 12 x 24″, and that only for dwarf breed juniors and small bucks. 24 x24″ and 18 x 24″ are the most common sized cages for single rabbits of small or dwarf breeds, such as Polish, Dutch, Holland Lop, Netherland Dwarf, and Himalayan. A doe and litter of dwarf or small breeds should have 30×24″ or 24×24″. Larger meat-type breeds such as Californians and New Zealand Whites do well in cages that are 30×24″ or 24×24″, with a larger 36 x 24″ used for does with offspring.
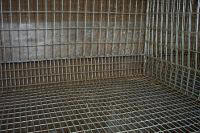
You should also decide whether you want to install baby-saving wire around the bottom of the cage. Baby-saver wire is wire of a smaller mesh along the bottom 3 or 4 inches of a cage, so that babies cannot crawl through it like they can the standard 1″x2″ mesh for the cage sides. [See photo at left.] Young babies can already crawl—I’ve found newborns 15 feet from their nests. If they wander into another hole, they can easily be killed by the doe next door, who is protecting her own space. I highly recommend it and it’s not hard to do.
You should also get an idea of what you want to use for dividers between holes. We used wire mesh but are planning to go back and install something more solid. The solid sides keep rabbits from spraying each other and staining other rabbit’s fur. Our main problem has been ear chewing. We’ve had three rabbits damaged so far when their long ears have drooped into the next hole. The down side to that is that spray reflects back onto the sprayer and can soil his fur more. It’s a tradeoff, though.
[After our first set of cages, we built another set with double side walls and a 3-inch gap between compartments to eliminate biting through the wire. I like this design a lot and use the gap for a hay rack.]
Next, you should give some thought to the front of your cage. Plan your space carefully. You need a door that is big enough to accommodate your kindling boxes and allows you to reach shy rabbits in the back. You need space for your watering system—whether it’s an attached crock, automatic waterer or watering bottle. Think about adding a hayrack. You’ll almost certainly be able to make those for free from your scraps. And, how about a feeder? Will you want to mount one through the cage wall?
We allowed space for a hayrack on the door, our automatic watering system and a through-the-wall type feeder. We did not count on space for temporary waterers (such as when we are medicating or when our normal watering system freezes). Think about these now. We also planned our space for labels for each hole.
Purchasing Cage Construction Tools and Supplies Needed
First, spend the money to buy some nice wire cutters. You will thank me for this piece of advice. You will be making lots and lots of little cuts. No one cut that hard, but the strain adds up quickly. Ours cost about $25 at a local home improvement warehouse and was worth every penny.
Next, buy a heavy-duty tool to remove j-clips (those are the little metal connectors that are the primary means for building the cages). Do not scrimp on this step. Those suckers are really tough to remove. And you will have to remove some. Believe me.
You will also need a tool to put those j-clips on with. The standard $5 job was just fine. I don’t recommend getting fancy with that. It’ll do.
A scrap of 2” x 4” lumber will come in handy. Something about 12 to 15 inches is fine. You can use this to help bend the baby guards up from the floor.
Needle-nosed pliers and regular pliers come in handy.
What Kind of Wire Should Be Used?
Now it’s time to decide what kind of wire mesh you will buy. There are several sizes and two basic kinds: galvanized before (which is more expensive) and galvanized after. Actually, galvanized before is also galvanized after. I would only use the more expensive variety if my cages were more subject to the weather or if I plan to use a lot of water under the cages, such as for washing away the rabbit waste. Our cages are in a barn, so we did not spend the extra money.
For the sides, fronts, backs and tops, you can use 1” x 2” mesh. For the bottoms and baby guards, you can use either ½” x ½” or ½” x 1”. We used the ½” x 1” type. Just make sure that the ½” side is placed up so that the rabbit’s feet rest on the smoother side.
You will need to purchase j-clips. And it takes more of them than you think it will. I purchased mine locally so that I could return unopened bags.
Get some plastic, snap-on cage edging for door openings and possibly the top of your hayrack. It will save you from many scratches and scrapes in the future.
The last thing to purchase is one door latch and wire of approximately the same gauge. Don’t go crazy trying to find the exact gauge; just get close. Study the latch carefully and learn to bend them yourself. My husband made two or three that were marginally functional before he got the hang of it. By the end, he could twist the latch and install the whole door in 15 minutes. It’s worth learning. On the other hand, he says he wishes we had just bought them all.
Cutting Out Pieces — Instructions
The directions I give here will be for a triple cage, 6 feet long, with three compartments that are 24” x 24”. To make cages with other dimensions, follow the instructions in italics. Click here for a printer-friendly short version of the pieces to cut.
Floor with baby guards: Cut one piece of your floor mesh (either ½” x ½” or ½” x 1”) that is 78 inches long and 30 inches wide (your wire probably came 30 inches wide). From each corner, remove a 3” square, leaving a solid outline (the part that you cut away will look something like a square comb with teeth in two directions).
To customize, cut the floor the width of the entire cage plus 6 inches by the depth of the cage plus 6 inches.
Interior baby guards: Cut two pieces of your floor mesh 24” x 3”.
To customize, cut pieces the depth of the entire cage by 3 inches.
End walls and Divider Walls: Cut four pieces of 1” x 2” mesh (I’ll call this wall mesh) 24” x 16”. You will use one on the right end, one on the left and two to divide the cage into three compartments.
To customize, cut end walls depth of entire cage x height minus 3 inches.
Front and Back: Cut two pieces of wall mesh 72” x 16”. You will use one in front and one in back. You will cut out the doors later. Just leave them solid for now.
To customize, cut front and back width of entire cage by height minus 3 inches.
Top: Cut one piece of wall mesh 72” x 24”.
To customize, cut top width of entire cage by depth of cage.
Doors and Door Reinforcement: I will give the dimensions we used, but remember to make yours the size you need to fit in your kindling boxes or accommodate anything else you might want to mount on the front of your cages. Cut three pieces of wall mesh 12” x 14” and three pieces of wall mesh 4” x 14” (these pieces reinforce the door and hold the latch).
To customize, make sure you cut your doors larger than the openings by 2 to 3 inches in both dimensions.
Optional Hay Rack: There are numerous ways to make hay racks. Ours are rather large as we feed hay to our rabbits continuously and don’t mind the large amount of hay lost to their entertainment. From scraps, cut three pieces of wall mesh 14” x 10” (use the 1” direction for the 14-inch dimension because you will bend at the 3” mark) and three pieces of wall mesh 3” x 8”.
To customize, use your imagination! Any number of configurations will work.
Assembling the Cage
Now that you have a solid understanding of all of the components of a good rabbit cage, it’s time to put it all together into a quality cage for your rabbit.
The Floor
Make sure you have the correct side of the floor mesh up. It’s the side where the wire is closer together. You can tell the difference easily by standing barefoot on each side. You can see why the closer mesh is easier on their feet and might save some sore hocks in the future.
Use the lumber scrap to hold down the bottom of the floor (I held it down with my feet) and begin bending up the 3-inch edges a bit at a time. I found it easier to work my way around the outside edge twice. The second time, the wire more easily stood up straight.
Now use two j-clips to connect each corner, making the bottom look like a large, shallow box.
From the crease you made by bending up the wire, count or measure over 2 feet and 4 feet (check it by going from the other direction as well). You will attach the baby saver strips across the cage bottom here. Connect to the bottom every few inches and to the sides as well. When you finish, your flat box will be divided into three, evenly spaced shallow compartments.
Adding the Walls and Top
Add the end walls and middle dividers next. They are installed on the baby-saver dividers and the end baby savers. Just use a j-clip every few inches. After that, you can add the front and back panels. Be sure to measure on the panels two feet where the walls should meet—don’t depend on it “looking right.” Until the cage starts to take shape, any number of places on the panel will look right. Once the walls are all on, you can add the top. Here is where you may have trouble with things lining up. It’s a good idea to use the pliers, especially the needle-nosed, to hold the wire together before putting on the j-clip. Another pair of hands can come in handy here, too.
The All-Important Front
It’s a good thing that you thought about what you want on your cage front, because now it’s time to cut out the door opening. Once it’s cut, you are stuck. We cut ours 11” x 10” and put it near the left so that we had room for our water and feeder on the right. Remember that the opening must be smaller than your door for the spring to work correctly. You can also cut your wire and mount your feeder at this time, if you are going to use one. Just make sure you’ve calculated everything before you cut the front
Doors and Latches
Assemble the door before placing it on the cage. The spring latch must be attached to the door so that it misses the vertical wires on the wall. In other words, check to see where it will hit and make sure that’s the right place. After the spring latch is attached to the door, securely attach the reinforcement panel over it and check again to see that the spring latch will hit the right place. Then attach the door to the cage with j-clips, flush with the “hinge” side of your opening. Make any final adjustments to the spring latch so that it will latch with reasonable ease and puts the appropriate pressure on the door to keep it closed.
Assemble the hay rack by bending the main panel three inches from each end, making a U-shape that will be the front and sides (the door or cage wall serves as the back). Attach the bottom piece to the lower rim of the sides and front. Now you can attach your hayrack to the door (or other place), if you like. Cut your snap-on edging and attach it to the rim of your door opening and possibly to the top of your hayrack (you will save a lot of scratches on your hand when you are stuffing hay into the rack).
Hanging: A Tricky Job
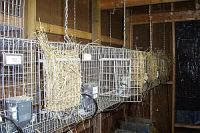
Make sure you have two people available to hang cages. The cage isn’t all that heavy, but the hooks have to have constant pressure while you are putting on the other hooks—if not the first come off and you have to start over.
We screwed eyehooks into the rafters of our barn and added s-hooks to that. We hung a chain from each of six hooks for each three-compartment cage. We placed another s-hook on each chain, level with each other, at the height we wanted the top of the cage to be. Then we hung one end of the cage first and pulled it out from the wall to maintain tension. We then hooked the remaining two back hooks followed by the remaining two front hooks and then slowly released the cage into place. At that time, we adjusted any hooks that were on the wrong link (too tight or too loose). If the chain were just a bit too loose, we twisted the eyehook in the rafter to make any fine adjustments needed. Then we cut the chain and went on to the next cage, starting it on the end s-hooks of the previous cage. In some cases, we used j-clips to bind together cages that refused to hang flat against each other.
It is imperative that you measure for the last cage in a row before you build it, if there is an obstacle (like a wall) on the end. Even though our barn is 24 feet long, we could not fit four six-foot cages because the cages are somewhat rounded and have double walls where two cages come together—they don’t lie perfectly smoothly against each other. We took one inch out of the last three holes to make them fit.
Your cage is now finished: just add water, food, hay and your Holland Lop rabbits!
What About Underneath?
Even though we’ve been talking about building cages, I can’t help but take a second to talk about what goes underneath. Obviously we did not include pans to catch the rabbits waste. In our barn, we have placed plastic buckets to catch the hay, manure and urine. I empty these every few weeks into the compost pile or around our orchard trees or wherever it’s needed in the garden (rabbit manure is a cold manure and can be used fresh, without composting). We will be building wooden bins (one long bin under each of our four rows of cages). In these bins, we plan to grow earthworms, harvesting the castings for our gardens and using the worms for fishing and perhaps one day, to sell.

